Moving is chaotic and horrible; however, there is a happier side when you can sit down (preferably not on a card board box), throw your feet up, and have some guests over. If you can do that, you are ready for a housewarming party!
The Party
The housewarming party does not have to be fancy or even carry much of a theme. What it does need to be is an open and inviting environment for you to host old friends, new friends, coworkers, neighbors, etc. There is no reason you can go solo in hosting (after all, you are the one celebrating!) or even have a friend host.
Figure out your guest list as soon as possible in order to get food and beverages figured out– and remember the capacity of your home! If you live in an urban apartment (think New York sized), but invite 100 people, even with the rule of 1/3 not showing, you still have 60+ people in your living room! One option out of this is to have an “open-house” housewarming. This is what we did. People can come and go as they choose with no pressure to hang around to the end. You could choose a sit down meal, but, again, think of the capacity of your home and amount of chairs available.
Another important factor is the time. If you are having a barbecue or other event that requires daylight, the party will fall more in the middle of the afternoon. Your party could also be open ended for the end time. It is up to you. We decided on 3 hours because we figured that was the longest people would want to sit around our house and it was also enough time to allow people to drop in and out as they pleased. Three hours also allowed us to determine food and drink quantities easier.
The Invites How-To
For our housewarming party, we did the obvious theme of moving. We used common (read: CHEAP!) items we already had like bubble wrap, packing tape, card board. The items to create the invites are:
- Bubble wrap
- Olfa Knife and a rule (scissors or whatever you are comfortable with cutting multiple items out with)
- Full sheet white stickers
- A printer/computer
- Brown Envelopes
- Jute Twine (for added moving theme)

The first step in creating the invites, I selected my bubble wrap. Who knew there were different colors and different sized air bubbles to choose from? Guess I never had a “fancy” move that required all that pizzazz. A roll of around 20 feet is around $10-15. A little pricey, but I chose to use an A6 envelope size (4.75″ x 6.5″) to maximize how much yield I would get from my roll. My roll had a perforation guide at every foot, so I made my enclosures 4″ x 6″. It is like it was meant to be cut into invitations. This cutting out task was a little tedious, but mostly because of boredom and trying to keep all your fingers from getting sliced off. However, I completed the task of cutting 80 rectangles during my lunch break. I had a template for the envelope size just to double-check my sizing.

Next, I used my computer to create the invite. I found some little rhyme from internet and stuck it on the top. Again, to tie into my theme, I used a font that looked like someone scrawling on a packing box and kept to a color palette of brown, red, white, and black. One thing to remember when creating the invitations, they must include: who, what, where, when, and VERY clear directions and, preferably, a map.

To be easy (or lazy) I printed the invitations on white full-page sticker paper so I would just have to attach them to the bubble wrap. I had these left over from the retirement party I threw, so this was a no cost. If you do buy these, buy online because they are significantly cheaper. I cut them out on my living room floor while watching TV. Another mind numbing process, but it does go quickly.

I also printed and cut out my direction card and map. On one side was a map with a picture of our home shown. This will help people when they are aimlessly driving around your neighborhood looking for your house number while you neighbors think someone is stalking them. So to avoid the cops being called on your friends, opt for a picture. I had the map and picture on one side, and the written directions on the reverse. Most people have GPS and cell phones, but old Aunt Edith will need some help getting there too, so just include it.

Next is to assemble everything! I had two types of envelopes stickers– one for hand delivery and one for mailing. The main difference being one had our return address on it. The picture above was for the mailing ones, and I cut off the mailing address for the hand delivered. And viola! Invitations complete.

The Favors How-to
For the favors, I wanted, actually needed, something easy. What you will need:

I wanted to keep in my theme of moving, so I tried to make them look like little moving boxes. However, after finding no cheap brown favor boxes nor wanting to assemble them, I settled on mini grocery bags. I got them for SUPER cheap at a warehouse club (around 500 bags for $4) and I also plan to use these for Halloween this year too. I used the twine I had used for the invitations to do a faux package wrap. I attached a thank you tag to complete the look. I filled them with candy to carry out the home “sweet” home theme.
The Tablescape How-To

I found some inspiration on Pinterest for this one. I used the idea of moving to include painting. The tablescape is really easy, and I had more than a few people astounded at how I did it. First buy empty paint cans. I could only find the ones I liked at Home Depot for about $4.98 a bucket. Next buy cheap plastic table cloths ($0.99 at Wal-Mart). I used a paper towel holder and a toilet paper holder to prop the paint cans above the table. Wrap the table cloths around the base of the holders and then stuff the paint cans on the top. They can teeter as much as you would like. I used the lids to indicate where the plates and utensils were located. I also laid out some clean paint brushes on the table to complete the look. Excuse the food containers– our caterer was running late and we did not have time to change them out.
The Party Flow
The biggest problem with a bunch of hungry thirsty guests is that they tend to hover by the food and drink. I did not want everyone hanging around in my dining room, so I separated my stations. I had four distinct stations:
- Appetizer Station
- This had all the main foods, plates, napkins, and was the first thing people saw as the entered the home (just because it was the layout of our home). This also allowed us to greet people, and then promptly tell them to please help themself and to enjoy.
- Dessert and Coffee Station
- This had cookies, little cakes, chocolates, etc. and also coffee. The coffee is good for those guests who imbibe way too much. This station was smaller, but had plates, cups, coffee extras, and napkins.
- Signature Drink and Wine Station
- We had two beverage dispensers and placed one on each side of the table. The table was positioned to allow people to walk around the table to get to whatever drink they were aiming for. Nothing worse than waiting behind an indecisive guest. The wine was also at each end.
- Tip: We used 9 oz glasses instead of 16 oz or red solo cups. This REALLY helped with clean up as many people did not abandon their half drank glasses around the house. We also felt with some people driving, the smaller glasses would inhibit large consumption.
- Beer Station (this was outside on the porch because we had big tubs of ice and tons of beer. Oranges and limes were provided)
- This got a lot of people out in the patio area to enjoy the weather and to let them see our backyard. We had light and dark beers as well as some local drafts for those finicky beer people.
The concept of different stations really did work and kept people bouncing around and mingling. Be sure to keep napkins at every station to keep your house tidy!
The Food
For the food, we catered. I was going to try to cook, but between the cleaning and being five months pregnant, I had to give in somewhere. We did make one item– Paula Dean’s Frito Corn Salad. Surprisingly, this was one of the most talked about appetizers! I will tell you– it is amazing. I would be awesome with a cookout meal. However, we did follow the some guidelines–
- Indicate on the invitation appetizers only.
- Our party fell between 5-8pm, which is iffy on the etiquette to serve dinner sized portions. Indicating that the party was cocktails and appetizers on the invite as well as calling it an Open House party allowed us to skirt around that rule. We chose food that could be easily held with one hand to allow people to walk around the house.
- Provide a variety of food for vegetarians and gluten-free guests.
- We provided about four appetizers that were vegetarian and three that were gluten-free. We only went a little extreme because close friends we knew had these dietary restrictions. Normally, only one to two plates would suffice.
- Label the food
- This just helps the guest feel more at home and more likely to try the food. I made coordinating place cards that accompanied each dish.
- Research on how much food you will need for your guest count.
- The worst thing to happen is running out of food. We had enough (we ate the leftovers for the next two days), but we did have some back ups in case people brought their kids or extra drop-in guests. Our emergency food were chips and salsa, chips and dips (store-bought), and cookies. Not lavish, but enough to keep the party rolling.
The Drinks
Our drink table had two signature drinks, an assortment of beers, and wine.
I am going to blame pregnancy brain on this one; I thought I had taken pictures of the drink table, but I scoured all our phones, cameras, and tablets, and there does not seem to be a single picture, but the signature drinks look almost exactly like the images from the websites.
Signature Drinks
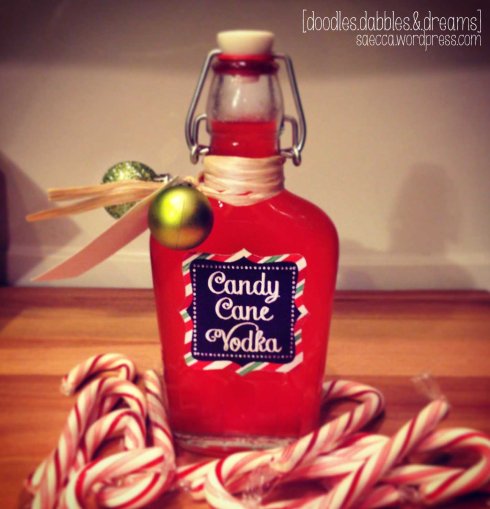
We decided to do signature drinks because we did not want to purchase bottles of liquor to sit out and have to have tons of mixers. We also did not want the liability of people taking shots and then trying to drive anywhere. Signature drinks, which would incorporate liquor, is an easy way to keep the cost down and to personalize the event. We named both drinks to the part, one was the street we lived on, the other the city.
Next, our signature drinks were decided upon by how easy it was to make as a batch. Plain and simple. Reason being is that if we did run out of mid party, so could throw the ingredients together quickly. Good thing we did, our guests went through 5+ gallons of the cocktails about mid-party and we had to make more.
If having more than one mixed drink provided, try using two different types of main alcohol. Some people hate vodka or gin or whatever, so this was there is always another liquor option. We used white rum and vodka (and we only had to buy one bottle of each).
Another factor for deciding the signature drinks was sex. No, not that type of kinkiness (get your head out of the gutter!), but male and female sex. One drink was pink because of the ingredients and, therefore,”girly”, the other was a more robust drink that was “manly”. My husband and I personally do not care what color drink we are holding, but some people might and since we had some new neighbors coming over, we wanted to make everyone comfortable.
First signature drink was a good ol’ mojito. Click the link to read through some of the reviews as other people have quick tips and tricks. This was our “manly” drink.

- 10 limes, fresh pulp and juice
- 30 leaves fresh mint
- 3/4 cup sugar
- 1 cup white rum
- club soda, chilled
- Place lime juice, mint and sugar into a pitcher
- Using a muddle stick mash to release mint oils, and dissolve sugar into juice.
- Add rum and lots of ice topped with club soda. Adding more club soda to glasses if a lighter drink is desired.
- Garnish with fresh mint and lime slices
The other drink, which apparently was the most amazing drink ever (about 10 different people stopped me to ask for the recipe and many others said it was the best mixed drink they’ve had), was the “girly drink”. Lots of men did have this drink, but, as I said, I only called it girly because it ends up being pink in color.
AMAZING Raspberry Beer Cocktail

- 3/4 cup frozen raspberries
- 3 1/2 (12-oz.) bottles beer, chilled
- 1 (12-oz.) container frozen raspberry lemonade concentrate, thawed
- 1/2 cup vodka
- Garnish: lemon and lime slices
- 1. Stir together first 4 ingredients. Serve over ice. Garnish, if desired.
- Note: To make ahead, stir together lemonade concentrate and vodka in a large container. Chill up to 3 days. Stir in raspberries and beer just before serving. Garnish, if desired.
Tip: Use frozen raspberries to keep the drink cold while it sits out. Also, cut limes ahead of time, then freeze them to put into the drink. This way ice will not water down the mix as it sits out. The lime trick works for the Mojito as well.
We served both signature drinks in large beverage dispensers we bought at a warehouse store for around $20, but you could also use a large bowl and ladle, but beware of the mess that might occur as guests get more tipsy.
One last thing is label your drinks by name and include the ingredients underneath. In this day and age, it seems like everyone has an allergy to something, so better to be safe than sorry.
Wine Cubes
As I mentioned above, no pictures. However, I have pictures of some of the wine cubes I used.
Wine cubes, you ask? Yeah, some people might frown on this, but when I started pricing out individual bottles, I could not muster buying all that wine– again, I was 5 months pregnant, so it would just taunt me on my wine rack. Also, this fit into our theme of moving perfectly!
We purchased the cubes at a warehouse store. Each cube was equivalent to 4 bottles of wine. So the red was $15 a piece and the white was $10. We bought three of each, which, in the end, was too much. I would say two whites and one red box would have sufficed since we had beer and two signature cocktail drinks.
I read somewhere that here in America, people tend to prefer white over red and also the most party pleasing wines were Chardonnay and Cabernet Sauvignon. If you have super wine lovers attending, you might have to up the ante.

To incorporate our thrifty wine cubes into the theme, I decided to turn them into moving boxes. I then stacked the extra cubes behind the open ones to look like there were boxes laying about. This allowed me to use the cubes as the decorations for the drink table.
How-To
All you need for this (cheap) decor:
- Roll of Craft Paper (do NOT buy it at an office supply store– like I did. Go to Walmart. It is significantly cheaper)
- Computer and Printer
- Full Sheet labels (or just plain paper and glue it on) Tags are below.
- Packing Tape
- Scissors
- Twine to wrap the boxes (not necessary, but I tied it to look like the invites)

Wrap the cubes like a present and cut out the area where the spigot falls. I used the packing tape liberally around this area of the spigot so the paper would be more water resistant. Then slap on the moving tags and the twine, and, viola! Easy drinks and decor!
So picture two open, then 5 boxes stacked behind them with the signature drinks flanking either side. That sums up the drinks.

Near the drinks, we kept cocktail napkins, glasses, extra mint and other garnishes.

Overall, the most important thing is to have fun and mingle! This is a picture of party at 8. Most guests actually stayed for the full 3 hours of the party (as well as some stragglers who stayed until midnight). But it was all in all good fun and everyone had a great time. You can see the dessert station in the bottom left.
Happy Housewarming Planning!!
Tags: DIY, hosting a housewarming party, Housewarming, housewarming favor, housewarming invitations, housewarming invite, Housewarming party, how to plan a housewarming party, tablescape







You must be logged in to post a comment.